Posted by Sheela Cooper
There are so many beautiful upholstered headboards available today, but they often come with a not-so-beautiful price tag. If you have a few basic tools, you can make a lovely upholstered headboard for under $100! When I made my headboard, my goal was to have a simple design that was lightweight and easy to hang. Keep reading if you’d like to make your own upholstered headboard!
There are so many beautiful upholstered headboards available today, but they often come with a not-so-beautiful price tag. If you have a few basic tools, you can make a lovely upholstered headboard for under $100! When I made my headboard, my goal was to have a simple design that was lightweight and easy to hang. Keep reading if you’d like to make your own upholstered headboard!
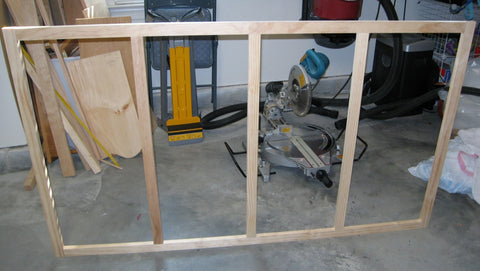
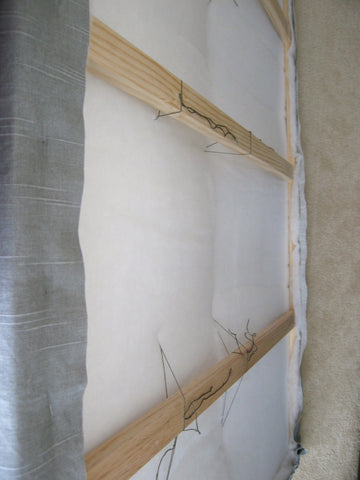
I began by building a simple frame from 1 x 2 pieces of pine. To determine the size I wanted, I simply measured the width of my queen bed mattress and added a couple inches. My frame is about 62” wide and 36” high. I used a miter saw to cut the wood down to size, but you could actually use a handsaw since you don’t need to do too many cuts (or any fancy cuts). I constructed the frame with a Kreg jig, but you can use wood glue and screws (countersunk) and it will be fine as well. I added three cross supports to keep the frame from bending. If I did this again, I would probably nail a piece of ¼” plywood to the entire front to provide a completely solid surface to the front of the headboard, which makes it easier to lean against in the bed. This will certainly add some weight to the headboard though, so keep that in mind if you take that route.
Here’s how mine looked when I was done building (please pardon the stuff in the background!):

As you build, make sure that your frame is straight and square. You don’t want a crooked headboard! When the frame was complete, I added a layer of foam. I used NuFoam, which is a “green” alternative to petroleum-based foam. I had to buy 18” width foam and use two layers of it to cover the entire three foot height of the headboard. I think I bought it from Joann’s (online) with a coupon, so the cost wasn’t too bad.

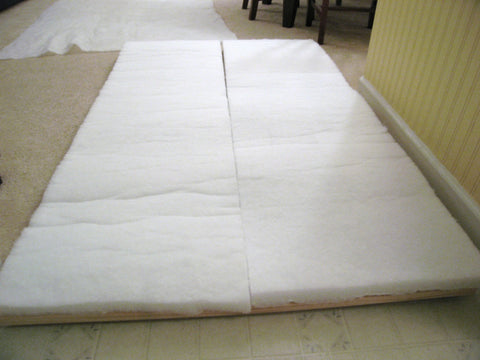


I then covered the foam with a layer of quilt batting to keep the foam secured and in place. I wrapped the batting around to the back of the headboard and stapled it into the wood with a light duty staple gun.

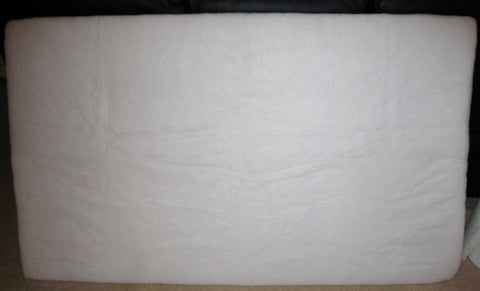
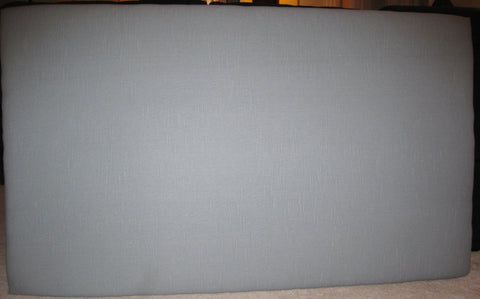
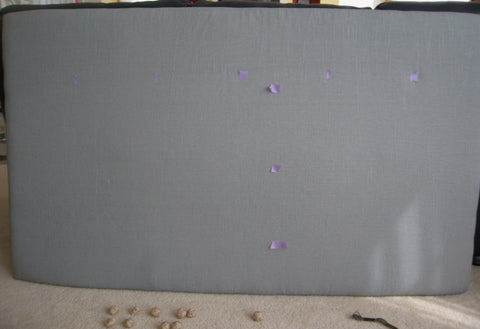
I chose a simple grey home dec weight fabric for my headboard. I prewashed it to get the stiffness out; if you do that, make sure that you buy enough fabric to allow for shrinkage. I wrapped the fabric around the batting and stapled that to the back of the wood frame. Fold your fabric corners neatly in the back so it looks smooth in the front. Trim off any excess batting and fabric after you have stapled it. Pull all of it tight before you staple so that you don’t have any sagging in the fabric.
If you don’t want to add any embellishments like buttons or tufting, you’re done at this point! Just add some D-ring hangers to the back of the headboard (on the wood frame) and hang it on studs in the wall behind the bed. Make sure to use hangers that are rated to hold the weight of the headboard and secure into studs to keep the headboard from falling.

If you would like to add buttons, use an upholstery needle and embroidery floss to attach them. I made jute buttons with jute twine that I bought at a home improvement store. I just started a small coil and then wrapped a ball like you would wrap a yarn ball. I finished the buttons by tucking in the loose end of twine and trimming it short. I took a few stitches around that spot with the embroidery floss before I attached them to the headboard.

Because I didn’t have a solid surface on the front of the headboard, I just had to pull the needle through fabric, foam, and batting. If you choose to put plywood on the front, you’ll need to drill holes in the plywood (wherever you’d like the buttons to be) before you add the foam, batting, and fabric. You’ll still be able to see the pre-drilled holes from the back of your headboard after you have added the materials to the front.
I used painter’s tape to indicate the spots where I wanted my buttons to go. Here’s an easy way to figure out even spacing of the buttons (or anything that you need to space evenly in a defined amount of space) – measure the entire width of the item, in this case the headboard. Mine was 62”. Divide 62 by the number of buttons you want to place, plus one. I wanted five buttons across, so I divided 62 by 6, which gave me 10 1/3”. I measured 10 1/3” across and marked the first button. From that button, I measured 10 1/3” across for my second button, and so on for all five buttons. Then figure out how far down you want your second row of buttons and use your buttons in the first row as a placement guide for the second row.

Thread your button onto your needle like this:

Push your needle from the from the front of the headboard to the back and pull until the button is secure on the front - you’ll need to tie down your buttons on the back side of the headboard, so use enough embroidery floss to be able to tie it down.
Here’s how I tied mine to make sure that the buttons wouldn’t slip or come loose:
Once your last button is in, you’re done with construction! The last thing you need to do is add the D-ring hangers, like I mentioned above.
Here are a few beauty shots of the final product:


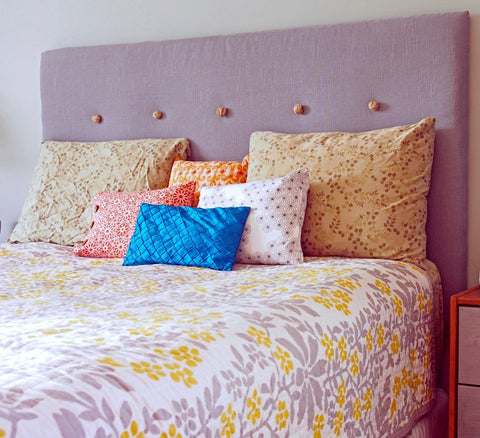 |
|Are you ready to make your own headboard now? Doing it yourself can easily save you $600 or more, and you can have it exactly the way you want it. Leave a comment to tell us if you’ve ever made a headboard (or have plans to in the near future).
NOTE: Please always use caution and common sense when doing any DIY project. Be safe – use appropriate safety gear and make sure your hanging hardware is properly installed. I have no affiliation with any products or retailers (except Home From India) mentioned in this post.